Thursday, June 30, 2011

Down, Goes the Floor

The most difficult and time consuming part of installing the hardwood floor, was trying to get the right tools.  We rented a super big and scary machine that snaps the nails down at an angle, but for reasons I'm less than thrilled to go into, it didn't work.  We wasted time trying staples instead of nails, before finally giving up and nailing it down by hand, old school.  The space is so small, it really didn't take that long.  And if we'd spent our time doing it that way from the begginging, instead of searching for the best equipment, than we would have finished much sooner.  But isn't that just the way.
We used Australian Cypress from Lumber Liquidators, after ordering, receiving, and changing our mind about some bamboo.  Lumber Liquidators was great though, and made the exchange for us, no charge.  I would definitely recommend buying your hardwood floor from them.
Halfway through the installation process

Still just halfway through the installation process

The floor looks amazing, but its hard to convey that through a camera.  This next picture is the best I can do, and even so, the real floor looks way better in person.  I promise.


Close up

Tuesday, June 28, 2011

Bay Window

The bay window was a challange.  Just getting the right size window sashes was a pain that lasted for weeks.  We tried ordering them through both Home Depot and Lowes on mulitple occasions, but there was always a problem.  The employees tended to know very little (sorry Home Depot and Lowes, but that's the truth), the available sizing didn't match up with the Tumbleweed plans, etc... on and on it goes.  We called Jeld-Wen the window company, we even called the Tumbleweed Tiny House Company, and eventually I considered selling my soul to the devil, if only he'd give me the proper sized window sashes. 
I noticed from all my blog surfing that people who built a fencl/tumbleweed house often changed the size and number of windows used in the bay area, or even its placement.  Steve and I considered these options, wondering if so many people did it this way because the sashes from the plans are impossible to come by.  Well, they aren't.  Ta-da!


Outside shot of bay window

Sorry, these aren't the best pictures.  It was rainy at the time, so our tarp is in the way.  But you can see what a good job Steve did putting the sashes together.  I'll admit, I was a bit skeptical that he could do it.  I mean, the plans don't come with instructions on how to make your own window.  He just had to try and mimic what Jay did with his fencl, and those pictures aren't any better, giving little detail.  But the window turned out amazing, and Steve gets all the credit.  


Inside shot of bay window


Thursday, June 16, 2011

Small Set Back

Pulling up the floor was a lot like cutting holes into the wall for windows--necessary, but painful.  I've mentioned in a previous post the excessive rain we've recieved in months past.  At one point or another it got under the plastic covering and snuck into the cracks of our subfloor.  If I'm making the rain sound evil, like a shifty bandit, that's because it is.  We always covered our house up after working on it and the rain still outmaneuvered us.  But no matter, Steve fixed it.  If it were up to me I would have lived in denial, inclined to believe that the soggy corner of our plywood floor would eventually dry out.  But it never did and when I wasn't looking Steve and our fathers removed the compromised area, reavealing a nasty surprise!


Small puddles had formed on top of our insulation.  And when you have a puddle you always get the mold that goes with it.  Oodles of mold growing in our only months old house.  But if you are grossed out, don't be.  We tore out the insulation, even the insulation foam, and dried everything off.  Eventually restoring it to tip top shape.  Can't have puddles in your floor! 

Thursday, June 9, 2011

Inside and Out

I haven't shown many pictures of the inside, mostly because we've been focused on getting the house dried in -- the roof finished, windows and door put in, etc.  But things have been moving along, if slowly, on the inside as well.  I finished the loft above the bathroom/kitchen (by myself).  I shouldn't brag since anyone who has built a tiny house knows it's not hard.  But I'll brag anyway because I always feel super proud of anything I do without help... and that doesn't happen often.  Pictured below is (my dad) Paul installing a window in what will be Steve and I's loft.

Paul in loft above kitchen and bathroom

We added an extra six feet in length to our trailer so we could change the storage area into a second loft for my stepdaughter.  It's situated just above the door and bay window area (as if it could fit anywhere else). 


A shot of the second loft

Like the loft, the bathroom walls were constructed on an afterthought, the rain driving us away from our outdoor work.  You'd think after framing the entire house we'd be pretty good at it.  Shamefully both Steve and I botched a wall -- each. 

Steve standing in the bathroom

I guess I should mention the big hassle we were having with a portion of the roof.  The plans don't really tell you how to approach framing the pretty but troublesome double peak that sits just above the entrance.  We researched online, looking for blogs and pictures that might give us insight.  Jay's blog has numerous photos: http://tinyhousejournal.com/jays-shafers-fencl/  But Steve's first attempt was to replicate what a fellow blogger had done, using his pictures as guide.  While I thought the roof didn't look bad, it also didn't look like what I wanted.  The peaks were equal in size, somewhat diminishing the aesthetic appeal.  So Steve took it down and tried again.  The second attempt was more in tune with Jay's fencl, but it took a week of tinkering to get the angles all figured out. 


Attempt number two


The problem with attempt number two is that the small peak was not quite small enough, throwing off the position of the second larger peak which is meant to sit just over the bay windows.  So Steve tore it down.  By this time my dad had arrived from PA to help.  He changed the overall angle...


...but he also changed his mind about the facade.  He's a function first type, and I suppose he didn't like the idea of a roof peak that was only meant to look pretty.  So he tore down his work too.  Which brings us to the final attempt.  It might not look like much, but it took weeks of tinkering to complete.


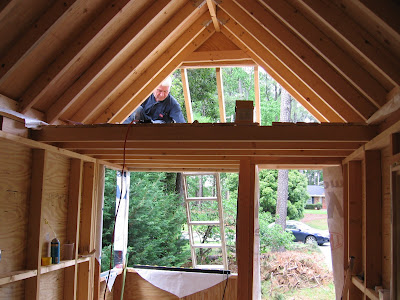
The facade is gone and the larger peak will give the additional loft more room.  Pictures of Steve and Dad sheathing to follow: 


A look at the inside:


Wednesday, June 1, 2011

Red Windows and Roof

What did I dread more than installing windows?  Nothing.  Nothing frightened me more than the thought of putting in my own windows.  I mean, think about it.  Think about putting in your own windows.  You don't know how to do it, do you?  I didn't know how either, but I did know I'd leave gaps.  There would be gaps, and then there would be bugs.  I can't imagine anything worse than bugs, well, except for windows.  But do you know what?  The windows were easy!  And do you know why?  Because I made my family put them in!   


John and Brenda Evans preparing for windows with flashing


I'm just kidding... sort of.  The more I work on our house the more I realize that each task is usually easier than I fancy it'll be.  I have a tendency to stress over the things I don't know how to do--like building a house.  But why shouldn't I?  I've never built anything, not even a toothpick-whatever-it-is kids make with toothpicks, or popsicle sticks, or whatever.  But the point is anyone can do it.  You learn as you go (thanks to the internet).  And just so you know the windows were finished in a half a day.  No gaps.

In this picture Steve is either screwing down the roofing, or falling off.  But he didn't do either until the roof paper was put on via the super speedy nail gun I like to call Little Killer.  It hasn't actually killed anyone yet, but luckily in life there are just some things that are not only predictable, but certain.